A Perth Riviera #11 - to end January 2014
Posted by Andrew Crocker on Mar 11th 2014
With the interior carpentry completed, everything was removed so that pieces of plywood could be sent off to the trimmers to be made into real seats and large numbers of ceiling planks varnished. With the insides of the boat once more accessible, flotation foam was installed. In Australia, there is a statutory requirement for flotation in boats under 6m length. The Riviera, at 6.1m (20'3") in theory lies outside this requirement (the Monaco at 5.9m [19'4"] would not) but the thought of 2 years of work disappearing beneath the water in the event of an unexpected wave swamping the boat was enough to convince me to do something about ensuring that the boat floated in all circumstances. 0.7 cubic metres of foam was obtained on the basis of calculations showing that this would float around 650kg (the weight of the engine, fittings and fuel) and then hacked into pieces that could be stuffed in various voids in the hull.
Teleflex CH1700 throttle/shift control in place. It is actually attached to a sub-frame underneath the ceiling timbers - not visible in this shot.
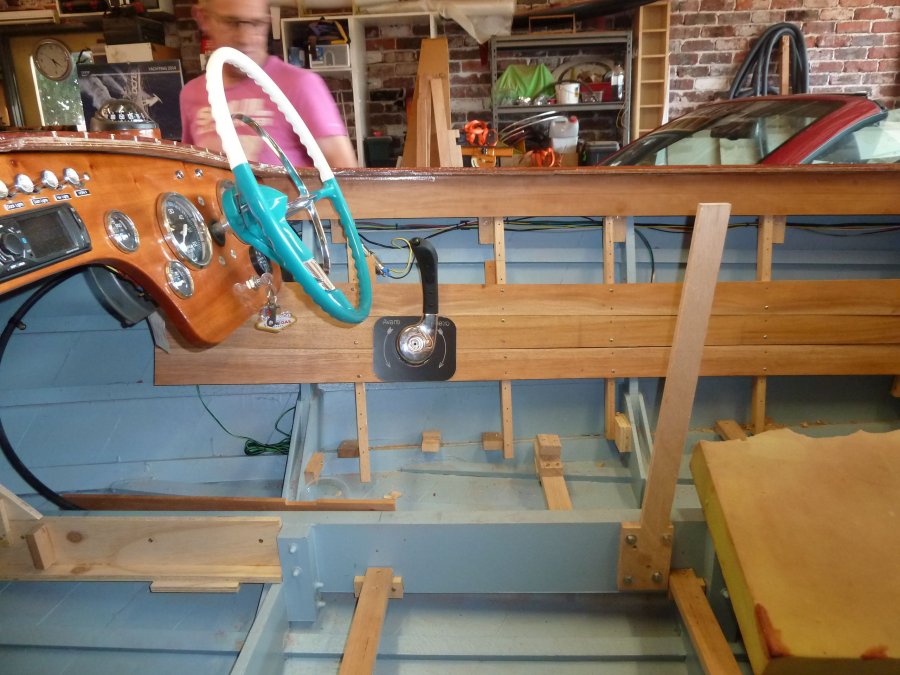
The almost final piece in the large puzzle was the fitting of the throttle/shift control unit. This had drifted late in the process due to a great deal of difficulty in getting a hold of the Teleflex control unit that I had wanted to use. In the end, fearing chaos on the schedule front, a different Teleflex unit was obtained along with the necessary cables. The unit used (CH1700) is considerably more bulky than the one I was chasing (CH2200) and this has had an impact on seating clearances. But, no throttle, no launching, so I pressed on.The absolutely final pieces in the puzzle were the two bilge pumps - one forward, one aft. I had left these to the very end to avoid large amounts of sawdust and other detritus clogging up the feeds. In the case of the forward bilge pump (a Whale low profile unit), the outlet is to the foredeck just forward of the windscreen. The rear unit (a Rule) has its outlet just above the starboard bumper rail. Both units have an auto/manual mode which contributed to the wiring rats nest behind the dash.
I mentioned in a previous post that the windscreen was a long lead time item. Finally, though, it appeared from the makers to be fitted.
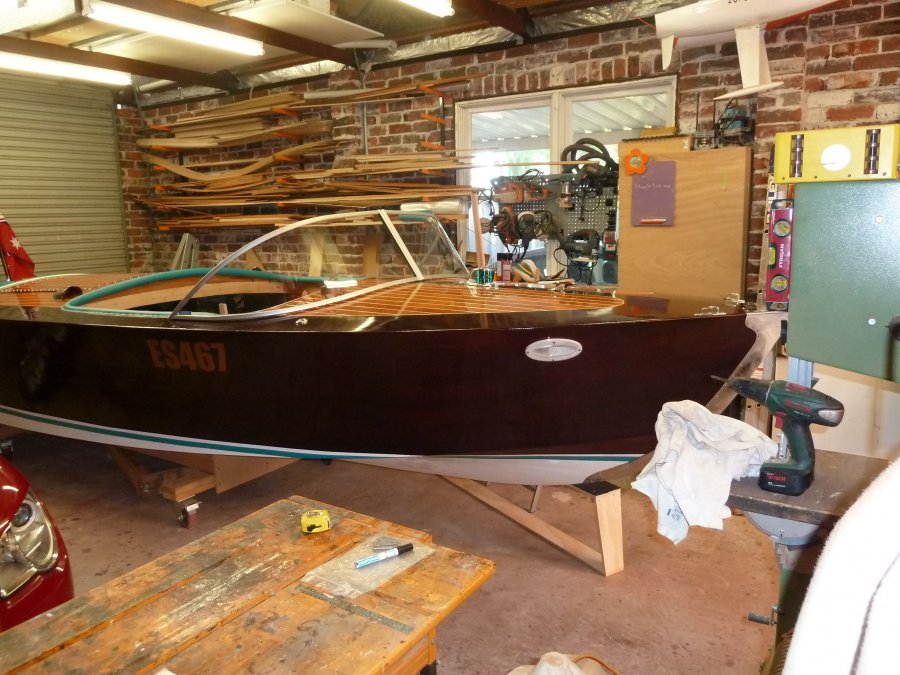
A windscreen appears - a changes the look completely. The Riva style front docking lights are visible in this shot as is the beginnings of the forward cockpit crash rail.
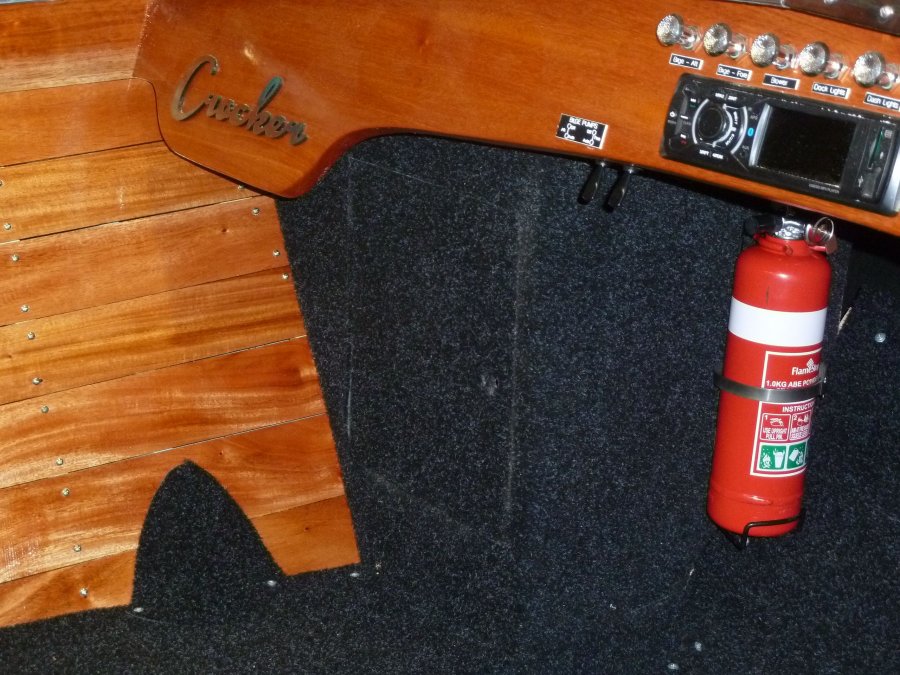
Detail from front cockpit showing black carpet, mandatory fire extinguisher, cupboard for fenders and ropes, and treatment of frame gussets.
With the seats due back from the trimmers at any moment, it seemed a good time to lay the carpet in the cockpits. For reasons that still escape me to some extent, I had decided on black marine carpet (ratherthan the more traditional linoleum or rubber). Given the rate at which this attracts sawdust andthe consequent need for vacuuming, I could regret this decision for a long time. But it does look quite nice ...
Finally, the seats arrived and were installed and the boat was complete - 22 months after the first piece of wood was cut. Hours spent? No idea. Cost? Don't want to know really, but more than bargained for - particularly when tool acquisition is taken into account. Now comes the launch - but without a trailer to transport the boat the 300m to the nearest boat ramp, no launch is possible. So it seems that another long lead time item now stands between the boat and water. As I write this, there is no ETA for the trailer. The decision to leave it off the trailer (and on a more mobile and compact building frame) now seems rather foolish but, as I have observed before, live and learn!
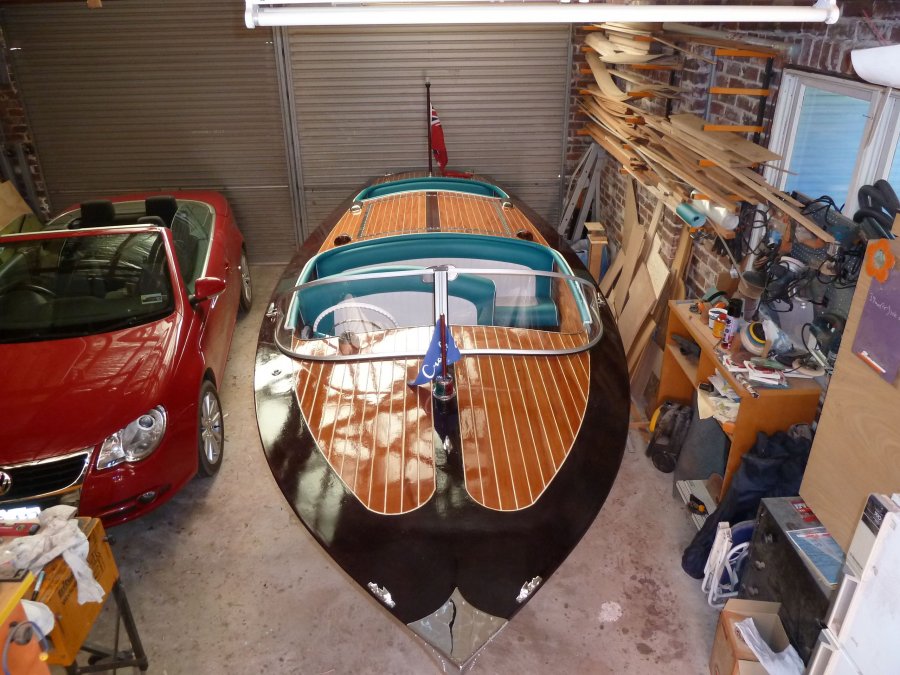 Complete and ready to launch.