A Perth Riviera #2 - to August 2012
Posted by Andrew Crocker on Nov 3rd 2012
With all frames constructed, it was time to get serious, clean out the build space and assemble a strong back. I decided to sit the strong back on castor wheels to allow the necessary jiggling of the entire assembly as required. This has proven to be a good move as it means that access to the frame can be optimized for the task at hand. I also mounted the strong back quite high to allow easy access under the sheers when that time came. As a final step, many new fluoro lights added to the shed to provide the necessary illumination.
With the build space sorted out and the strong back assembled, a new batch of wood appeared on the door step in mid June 2012. In an effort to stay ahead of the build process, all long pieces (stringers, keels, chines, sheers, battens) were cut at the same time. This meant that I could move through the build without needing to stop and cut more wood. Finally, stringers could be mounted on the strong back and the shape of things to come began to emerge.

All frames were then threaded onto the stringers and the bow section added - suddenly, it all looks like a boat (and the build space became rather full).
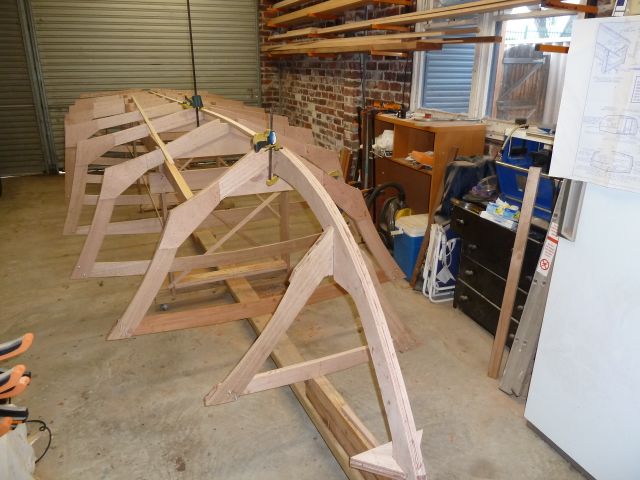
All frames were checked for position - level in particular - as a very small discrepancy in the cutting of the plywood keel sections on the frames that bear on the motor stringers can lead to a significant issue at the chines and sheers. A few had to have packing inserted to sort this out. Fairing battens were used to then ensure that the resultant frame would yield a fair surface when the time for laminating came. Even after all this checking, there was still significant trepidation when glue was finally applied - and the chance for fixing anything disappeared.
For the ties between stringers and frames, I used the wooden option (rather than metal as it was clear that batten slots were going to intersect with a few of the ties), and acorn nuts on the bolts to avoid too many sharp edges in the bottom of the boat. While no doubt a good idea for the future, it did require a seemingly endless process of bolt test fitting, trimming and re-assembly to achieve. Finally, the frames were permanently attached to the stringers (for better or worse) by the end of June 2012. For various reasons, it was decided not to pre-coat the frames with epoxy prior to mounting them on the stringers. Once again, in retrospect, this was not a great idea. While they will be easy enough to coat after the boat is rolled over, there was a feeling that the epoxy may have stabilized the Tasmanian Oak grain a little and perhaps prevented the level of tear-out that was encountered. Maybe next time.
Now to the keel.Long pieces of wood are not easy to come by these days (at least not in this neck of the woods) but, fortunately, the keel pieces were an exception with two 6 metre lengths of Tasmanian Oak available which avoided having to scarf them. Fitting the keel timbers presented no special challenges other than the stress it placed on my clamp collection.
As can be seen from the photo, some chine slots were also being cut at the same time in preparation for the more complicated process of the chines.
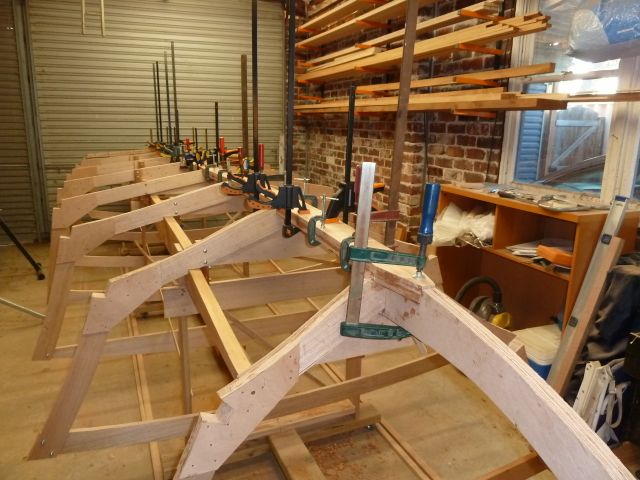
Both the chines and sheers required scarfing. The scarfing jig described by Mark Bronkalla was used with a 9:1 angle. All the scarfs were done off the boat as I had sufficient space to do so and a fairly simple clamping arrangement (using small G clamps as they allowed more control) was used. All have survived the build process quite well with no evidence of failure or problems taking a fair curve (although I did certainly try to keep the scarfs toward the stern where the curve is less extreme).
No steaming was required for the chines and the only real issue was resolved by fitting a number of temporary braces between the frames to stop them moving around during the process of fitting. Once again, the lack of an infinite collection of clamps in my world means that I could only glue up one chine at a time. But, for all that, they came together easily.
The sheers, on the other hand, were a constant pain. Cutting the slots is the first chore and a foretaste of the amount of time to be spent bending and sitting down to deal with the various operations required on the sheer - fairing in particular. Somewhere in the sheer slot cutting process, a mismatch occurred between the slot depth and the wood thickness which would come back to haunt me later. But, the slots were eventually cut and the process of laminating up the sheers began.
By the end of July 2012, the sheers and chines were both completed and the pile of wood was looking very much like a boat.
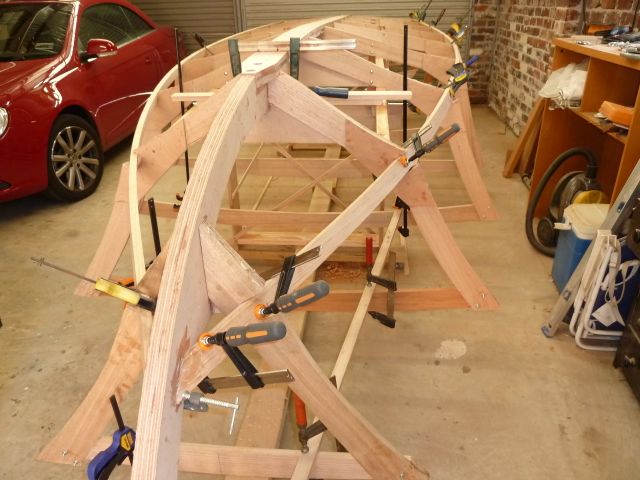
A simple jig was made to allow the batten slot cutting to be done with a router. All were done this way with the exception of the slots on the forward sections where the curve of the sides and the angle of the batten precludes it and so they were cut by hand. While tedious, the process was not difficult apart from the constant tear-out on the Tasmanian Oak frames which required very shallow and slow cuts. Which of course slowed the process still further.
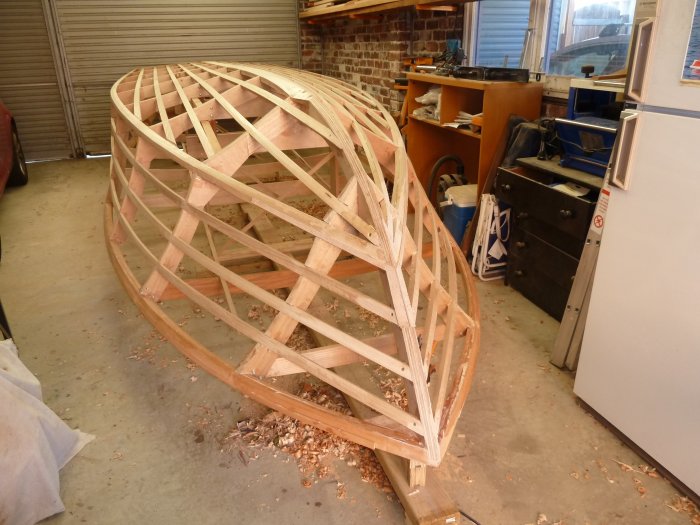
All battens were scarfed using the 9:1 jig. Fitting the battens was generally straight forward although made slightly more complicated than needs be by a decision to extend all battens to the frames (rather than cutting some short). This decision came back to bite me as my estimate of where the end of batten should meet the frame was not accurate and some filler pieces were required to re-establish a fair curve. *
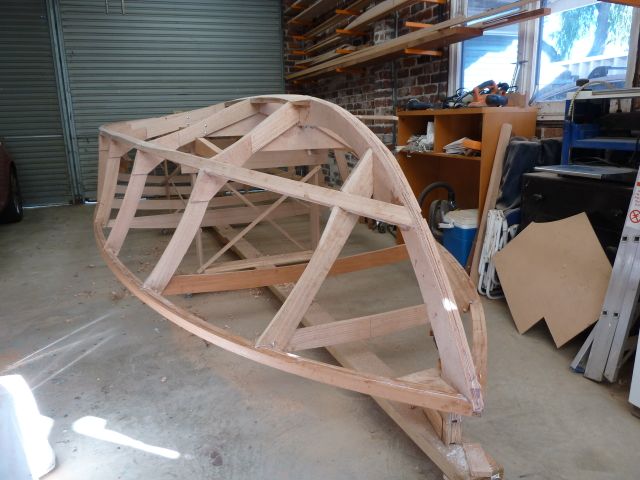
The only crisis came with one of the side battens. I had attempted to space the side batten slots to keep the batten straight as it proceeded towards the stem. In a couple of cases, however, a downward curve was introduced to the batten at the forward section. In general, this caused no issue but in one case, after carefully gluing and clamping the batten down, I came out the following morning to discover that the batten had fractured between the frames as the downward curve had put too much pressure on the batten. Rather than cut the entire batten out of the boat (a truly horrendous proposition), I carved up a backing piece and glued and clamped the thing together back to the required fair curve. This seems to have survived ok but it was a nasty moment. For all that, by the end of August, a real frame had emerged.
A month long holiday with my wife now intervened but it did serve to put off the evil day of fairing the frame off into the future (as well as allow an extended period of eating and drinking).
* Editor's note: It's best not to end a batten on a frame as the batten will bend better when it extends as far as practical forward of a frame.